
Today we’re going to show you how to make your video calls a lot more interesting. We’ve all gotten used to talking at our computers over the last year and a half, and many of us have even created a dedicated space just for those calls. But sometimes you have to shake things up a bit and breathe a little more life into something that has become routine and somewhat dull. That’s where the green screen comes in.
Why You Should Do This
While it’s nice to have a dedicated home office space, there are a lot of people who don’t have that luxury. Maybe you don’t feel like rearranging furniture or making your background appear more work friendly just to make video calls. Maybe you just don’t want to be that person whose roommate/partner unexpectedly walks into the shot in their underwear. Or maybe you just want to be the cool person in the virtual room. Whatever your reason, you’ll be sure to stand out in a good way.
What A Green Screen Does

A green screen will allow you to project any background you want into your video calls. Whether it’s a static image, a looping video, or a combination of the two, the green screen can handle it all. All you need to pull this off is:
- A webcam (obviously)
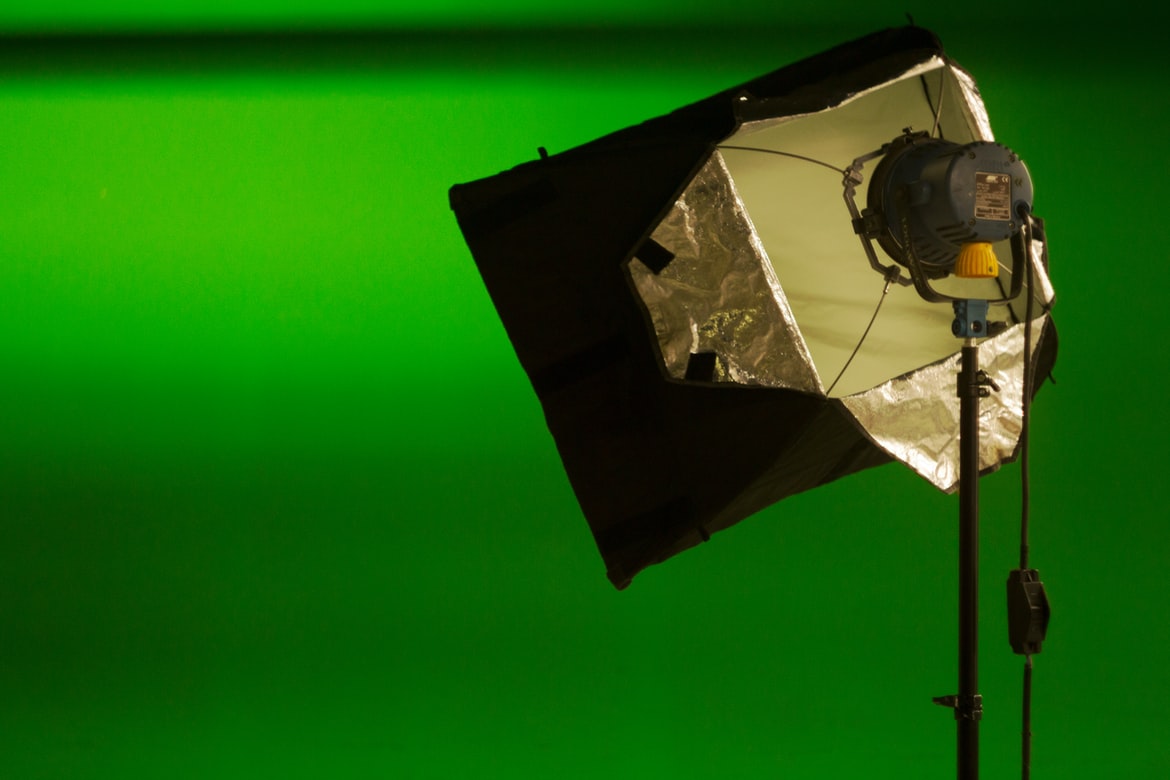
- A lighting source for the green screen
- A green screen of your choice
- Free software called OBS
- OBS stands for Open Broadcaster Software. It has long been the go-to program for livestreaming on the internet.
- OBS will allow you to configure your green screen settings in addition to creating custom scenes that you and your meeting buddies can enjoy at will.
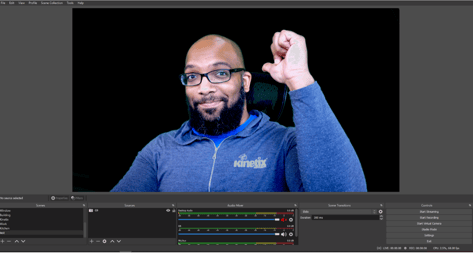
Once you download the software, it’s time to work some magic. The main screen in OBS is divided into four main sections:

- Scenes
- Scenes are a group of customized settings that you can set up for specific situations. Each scene is self-contained and any changes you make only affect that specific scene.
- Sources
- The Sources section contain all the media you’re going to use for a scene. A source can contain elements such as your camera, images, microphone settings, browser windows and more. You can get very in-depth and complex with Sources, but we’re going to keep it simple for now.
- Audio Mixer
- Scene Transitions
- We’ll be focusing on Scenes and Sources for the most part.
Let’s Make Magic
- Set up your green screen behind you and open OBS.
- The screen will likely be blank because we haven’t set up any scenes or sources.
- Click the + button in the Scenes section and give it a name.
- Now you need to populate your scenes with media.
- With your scene selected, move your mouse over to the Sources section and click the + button.
- Select “Video Capture Device” from the list of options that appears.
- Name your source (something like webcam is fine) and press “OK.”
- On the next screen, select your webcam and click “OK” again.
- You should now see your webcam image on the main OBS screen. Use the red boxes to size your image to your liking.
- Now we need to make your green screen magically disappear.
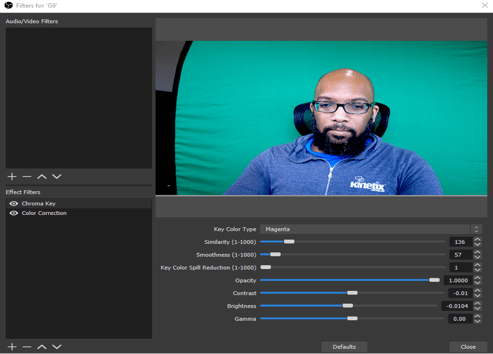
- You can do that by right-clicking on your webcam in the Sources box and selecting the “filters” option.
- Click the + icon in the Effect Filters section and select “Chroma Key.” A set of options with sliders should appear.
- Click on the “Key Color Type” menu and select “Green.” Now everything that is green will vanish and you’ll look like you’re sitting in an endless void. Feel free to adjust the similarity and smoothness sliders to home in your look.
- Applying a custom background is very easy.
- All you have to do is save the image you want to use and add the file as a Source within your Scene. If you can’t see your webcam on top of the image of video you added, make sure your camera source is above the file you’re using in the Sources section.
- You can easily drag and drop the files to fit the order you need.
Show The World
When you want to show your custom scene in a video call, all you have to do is:
- Open OBS and click on “Start Virtual Camera” that’s located in the “Controls” section on the far right. Once you do this “OBS Virtual Camera” will show up as a video source in the video call software you’re using.
- Make sure that’s selected, and you’re golden.
These steps will get you up and running, but you may need to make some adjustments here and there. You may need to adjust your lighting if you feel your green screen background or yourself is looking a little weird. I know all this may seem a little complicated at first, but I promise it’s not as bad as it sounds. Using a proper green screen is also 10x better than using the built-in background replacement software video call applications use. Give this a try during your next meeting!
See what's possible with this short video I cut together to promote this blog:
